

'll Hacker
[ML 실습] 4일차 복습- 판다스 DataFrame(1) 본문
DataFrame과 리스트, 딕셔너리, 넘파이 ndarray 관계
사이킷런의 많은 API는 DataFrame을 인자로 입력받을 수 있지만, 기본적으로 넘파이 ndarray를 입력 인자로 사용하는 경우가 대부분이다. 따라서 DataFrame과 넘파이 ndarray 상호 간의 변환은 매우 빈번히 발생한다.
넘파이 ndarray, 리스트, 딕셔너리↔️DataFrame
DataFrame은 칼럼명을 가지고 있다. 넘파이나 리스트, 딕셔너리는 칼럼이 없기 때문에 변환 시에 칼럼명을 지정해줘야한다. 판다스 DataFrame 객체의 생성인자 data는 리스트나 딕셔너리 또는 넘파이 ndarray를 입력받고, 생성인자 columns는 칼럼명 리스트를 입력받아서 쉽게 DataFrame을 생성가능하다.
DataFrame은 기본적으로 행과 열을 가지는 2차원 데이터이다. 따라서 2차원 이하의 데이터들만 DataFrame으로 변환될 수 있다.
1차원 데이터 변환
import numpy as np
import pandas as pd

col_name1 = ['col']
list1 = [1,2,3]
array1 = np.array(list1)
print('array1.shape:',array1.shape)

# 리스트를 이용해 DataFrame 생성
df_list1 = pd.DataFrame(list1, columns=col_name1)
print('1차원 리스트로 만든 DataFrame:\n',df_list1)

# 넘파이 ndarray를 이용해 DataFrame 생성
df_array1 = pd.DataFrame(array1, columns=col_name1)
print('1차원 ndarray로 만든 DataFrame:\n', df_array1)
1차원 형태의 데이터를 기반으로 DataFrame을 생성하므로 칼럼명이 한 개만 필요하다.
2차원 데이터 변환
칼럼명은 3개가 필요하다.
# 3개의 칼럼명이 필요함
col_name2 = ['col1','col2','col3']

# 2행 x 3열 형태의 리스트와 ndarray 생성한 뒤 이를 DataFrame으로 변환
list2 = [[1,2,3],[11,12,13]]
array2 = np.array(list2)
print('array2 shape:',array2.shape)
df_list2 = pd.DataFrame(list2, columns=col_name2)
print('2차원 리스트로 만든 DataFrame:\n',df_list2)
df_array2 = pd.DataFrame(array2,columns=col_name2)
print('2차원 ndarray로 만든 DataFrame:\n',df_array2)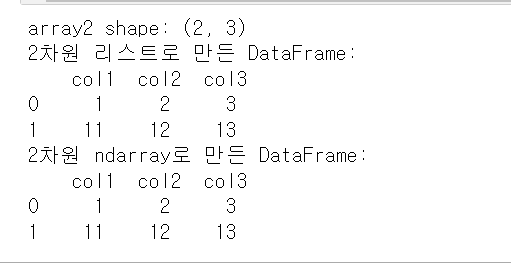
딕셔너리를 DataFrame으로 변환 시에는 딕셔너리의 키는 칼럼명으로, 딕셔너리의 값은 키에 해당하는 칼럼 데이터로 변환된다. 따라서 키의 경우는 문자열, 값의 경우 리스트 형태로 딕셔너리를 구성함
DataFrame의 칼럼 데이터 세트 생성과 수정
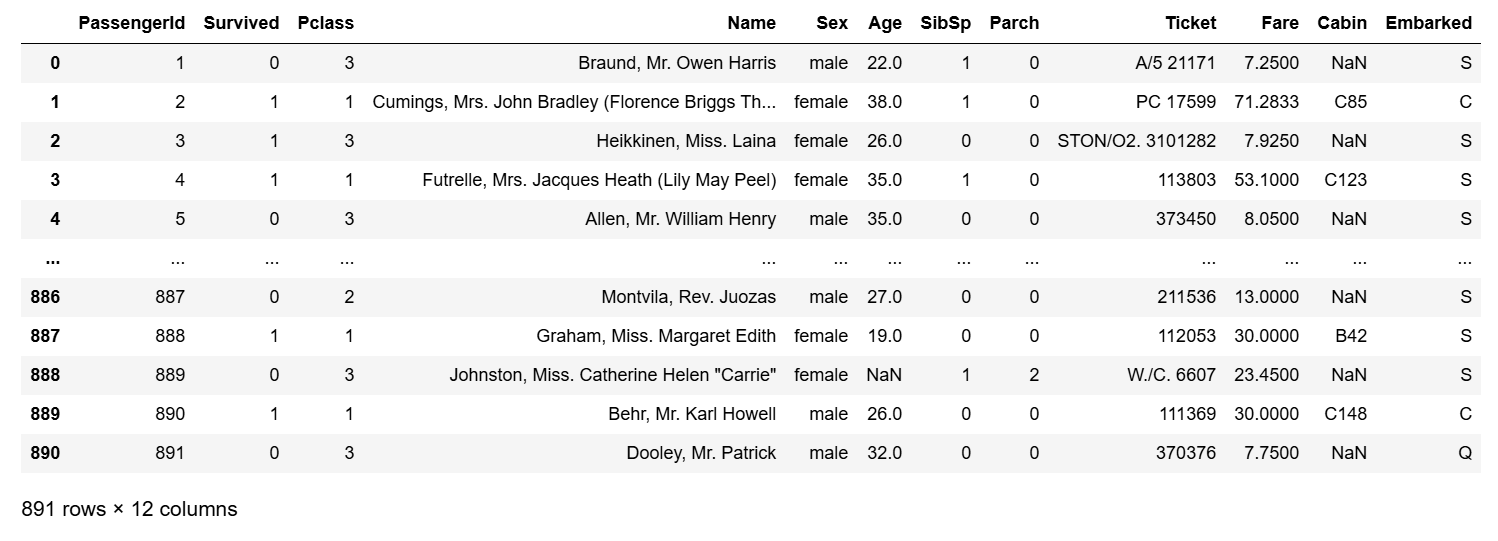
<원래 DataFrame>
titanic_df['Age_0']=0
titanic_df.head(3)
[ ] 연산자를 이용해 새로운 칼럼명을 입력하고 값을 할당해준다.

위 결과처럼 새로운 칼럼명 'Age_0' 으로 모든 데이터값이 0으로 할당된 Series가 기존 DataFrame에 추가됨을 알 수 있다.
titanic_df['Age_0] = 0과 같이 Series에 상숫값을 할당하면 Series의 모든 데이터 세트에 일괄적으로 적용된다. 넘파이의 ndarray에 상숫값을 할당할 때 모든 ndarray 값에 일괄 적용된다,
titanic_df['Age_by_10'] = titanic_df['Age']*10
titanic_df['Family_No'] = titanic_df['SibSp'] + titanic_df['Parch']+1
titanic_df.head(3)
⏫기존 칼럼 Series를 가공해 새로운 칼럼 Series인 Age_by_10과 Family_No가 새롭게 DataFrame에 추가됨을 알 수 있다.
titanic_df['Age_by_10'] = titanic_df['Age_by_10']+100
titanic_df.head(3)
새롭게 추가한 'Age_by_10' 칼럼 값을 일괄적으로 기존 값+100으로 업데이트함을 알 수 있다.
DataFrame에서 데이터의 삭제는 drop( ) 메서드를 이용한다.
DataFrame.drop(labels=None, axis=0, index=None, columns=None, level=None, inplace=False, errors='raise')이 중에서 가장 중요한 파라미터는 labels, axis, inplace이다.
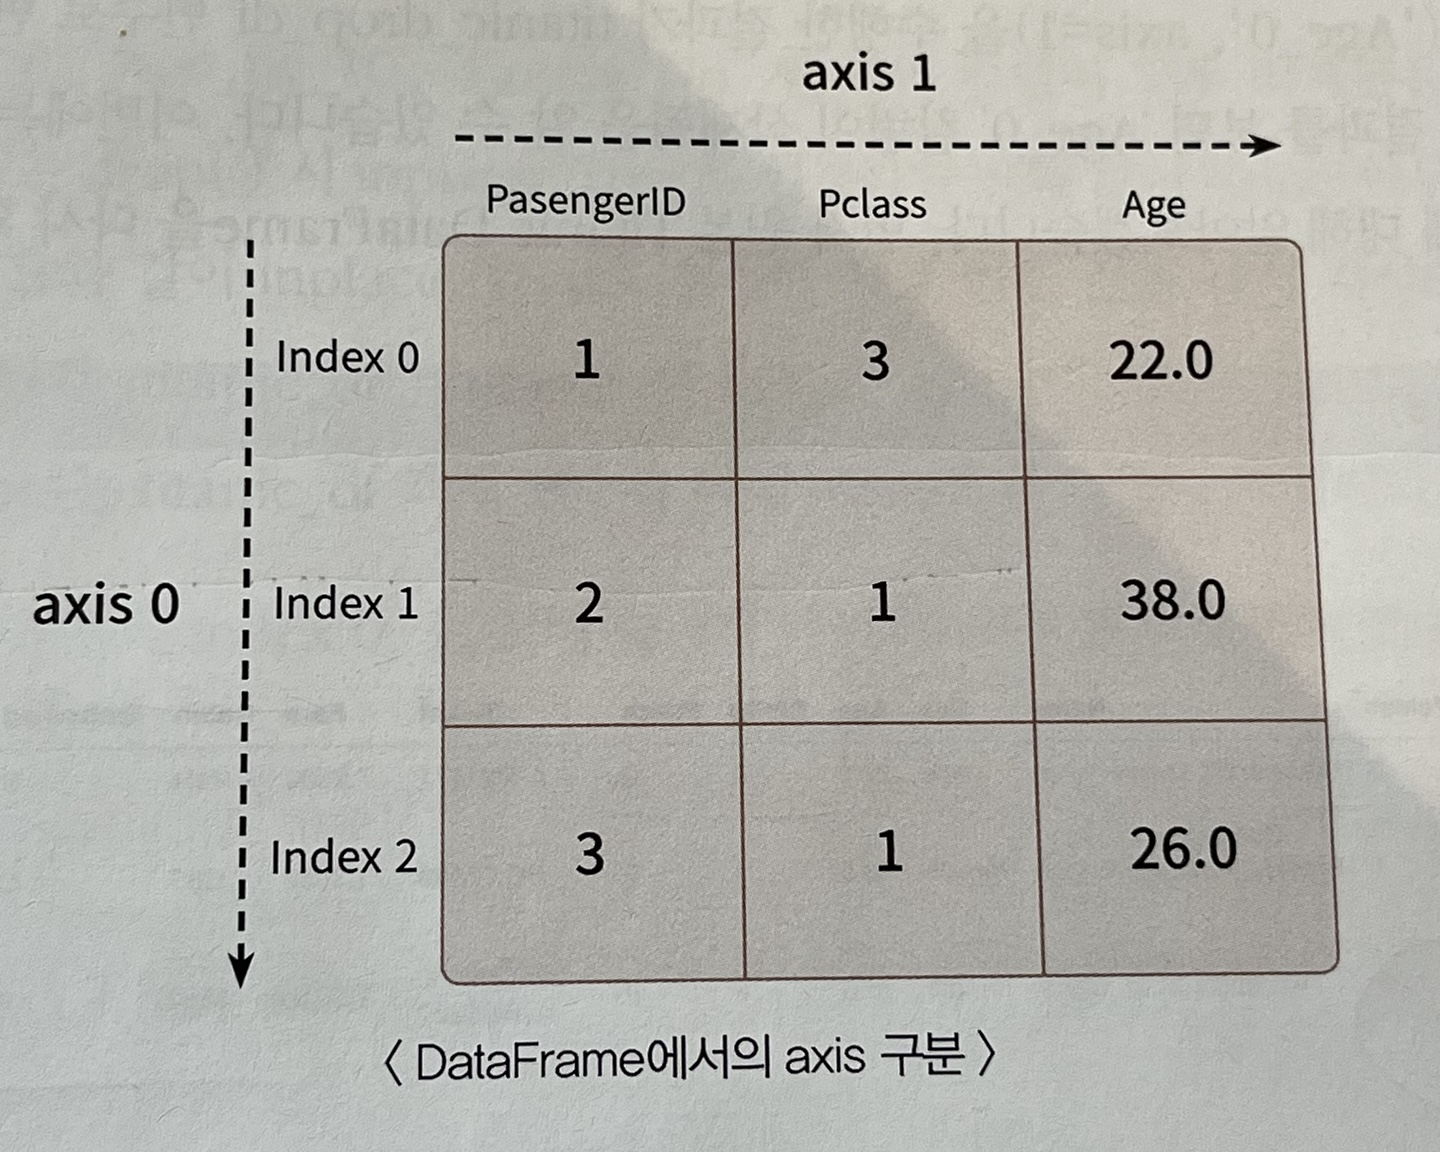
axis=0은 로우 방향 축, axis=1은 칼럼 방향 축이다.
titanic_drop_df = titanic_df.drop('Age_0',axis=1)
titanic_drop_df.head(3)
titanic_drop_df 변수의 결과를 보면 'Age_0' 칼럼이 삭제됨을 알 수 있다.
하지만, 원본 Titanic DataFrame을 다시 확인해보면 아래 사진처럼 'Age_0'칼럼이 존재한다는 것을 알 수 있다.
titanic_df.head(3)
그 이유는 inplace = False로 설정했기 때문이다.
Inplace=False이면 자기 자신의 DataFrame의 데이터는 삭제하지 않으며, 삭제된 결과 DataFrame을 반환한다.
따라서 inplace=True로 설정하면 자신의 DataFrame의 데이터를 삭제할 수 있다. 또한 여러 개의 칼럼을 삭제하고 싶으면 리스트 형태로 삭제하고자 하는 칼럼명을 입력해 labels 파라미터로 입력하면 된다.
drop_result = titanic_df.drop(['Age_0','Age_by_10','Family_No'],axis=1,inplace=True)
print('inplace=True로 drop후 반환된 값:',drop_result)
titanic_df.head(3)
'Age_0', 'Age_by_10', 'Family_No' 칼럼을 모두 삭제⏬

axis=0으로 설정하여 index 0, 1, 2 행 삭제⏬
pd.set_option('display.width',1000)
pd.set_option('display.max_colwidth',15)
print('###before axis 0 drop ###')
print(titanic_df.head(3))

titanic_df.drop([0,1,2],axis=0,inplace=True)

print('### after axis 0 drop ###')
print(titanic_df.head)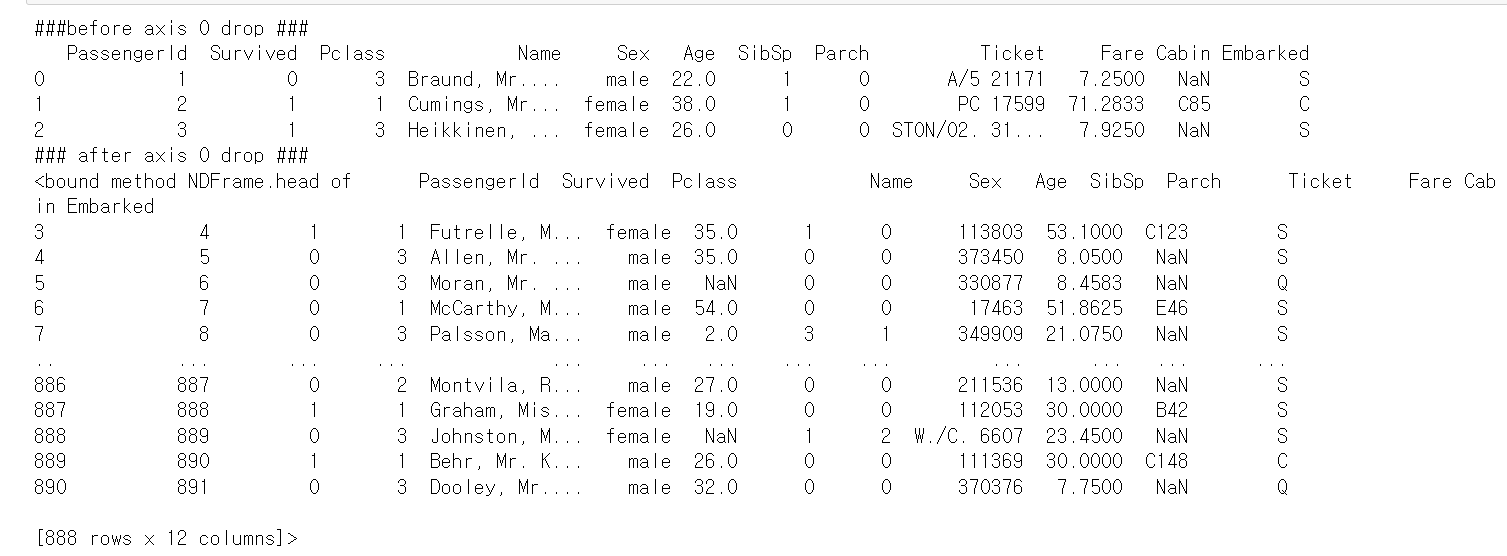
drop메서드 정리:
- axis : DataFrame의 로우를 삭제할 때는 axis = 0, 칼럼을 삭제할 때는 axis = 1으로 설정
- 원본 DataFrame은 유지하고 드롭된 DataFrame을 새롭게 객체 변수로 받고 싶다면 inplace = False로 설정(디폴트 값이 False임)
- 원본 DataFrame에 드롭된 결과를 적용할 경우에는 inplace = True를 적용
- 원본 DataFrame에서 드롭된 DataFrame을 다시 원본 DataFrame 객체 변수로 할당하면 원본 DataFrame에서 드롭된 결과를 적용할 경우와 같음
(단, 기존 원본 DataFrame 객체 변수는 메모리에서 추후 제거됨)
Index 객체
RDBMS의 PK와 유사하게 DataFrame, Series의 레코드를 고유하게 식별하는 객체이다.
DataFrame, Series에서 Index 객체만 추출하려면 DataFrame.index 또는 Series.index 속성을 통해 가능하다.
Index객체의 values 속성으로 ndarray값을 알 수 있다.
# 원본 파일 다시 로딩
titanic_df = pd.read_csv(r'C:\Users\yunju\Documents\ML\titanic_dataset\titanic_train.csv')

# Index 객체 추출
indexes = titanic_df.index

# Index 객체를 실제 값 array로 변환
print('Index 객체 array값:\n', indexes.values)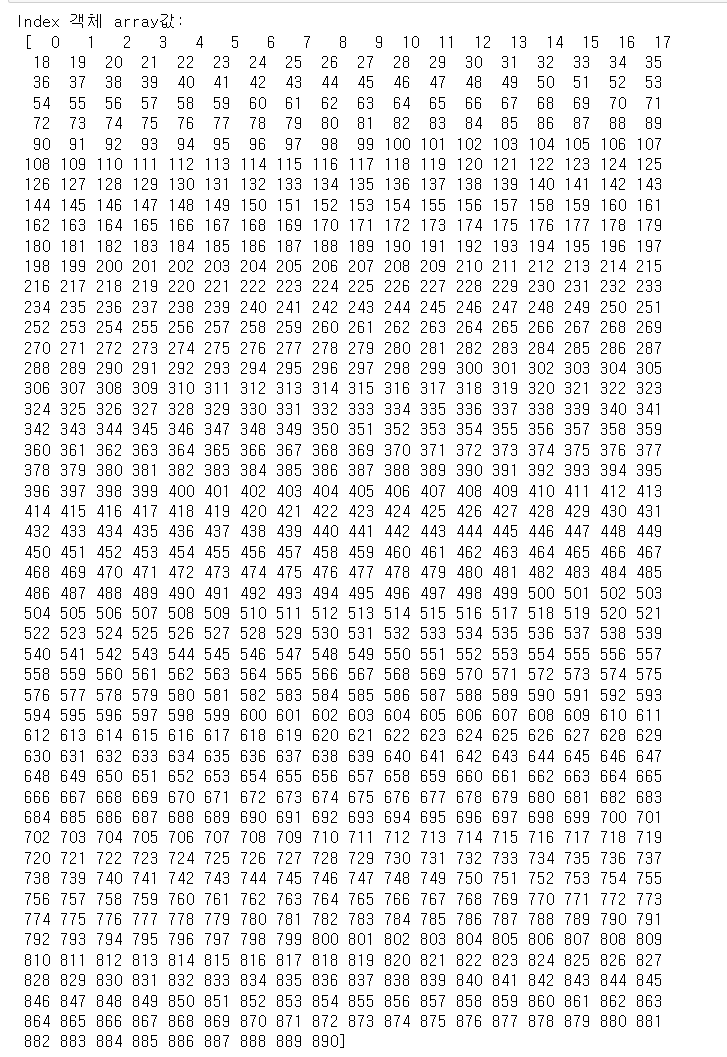
Index 객체는 식별성 데이터를 1차원 array로 가지고 있다.
또한 ndarray와 유사하게 단일 값 반환 및 슬라이싱도 가능하다.
하지만 다음 코드처럼 한번 만들어진 DataFrame 및 Series의 Index 객체는 함부로 변경할 수 없다.
indexes[0] = 5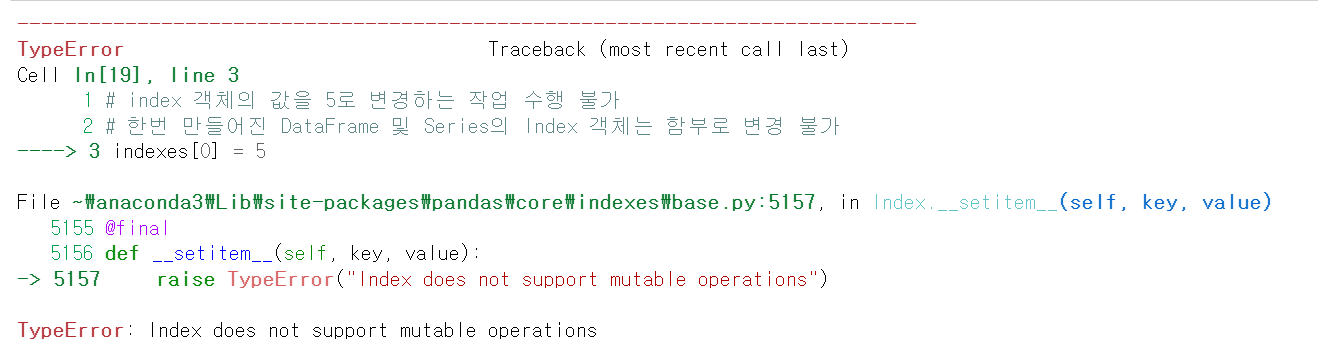
series_fair = titanic_df['Fare']
print('Fair Series max값:',series_fair.max())
print('Fair Series sum값:', series_fair.sum())
print('sum() Fair Series', sum(series_fair))
print('Fair Series + 3:\n',(series_fair+3).head(3))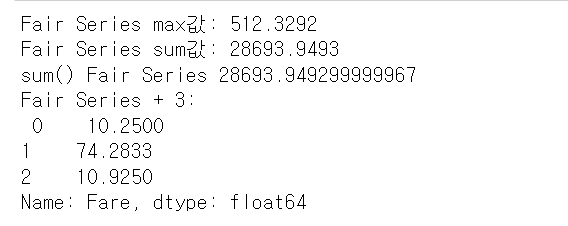
DataFrame 및 Series에 reset_index( ) 메서드를 수행하면 새롭게 인덱스를 연속 숫자 형으로 할당하며 기존 인덱스는 'index'라는 새로운 칼럼명으로 추가한다.
titanic_reset_df = titanic_df.reset_index(inplace=False)
titanic_reset_df.head(3)
reset_index( ) 는 인덱스가 연속된 int 숫자형 데이터가 아닐 경우 다시 이를 연속 int 숫자형 데이터로 만들 때 주로 사용한다.
print('### before reset_index ###')
value_counts = titanic_df['Pclass'].value_counts()
print(value_counts)
print('value_counts 객체 변수 타입:',type(value_counts))
new_value_counts = value_counts.reset_index(inplace = False)
print('### After reset_index ###')
print(new_value_counts)
print('new_value_counts 객체 변수 타입:', type(new_value_counts))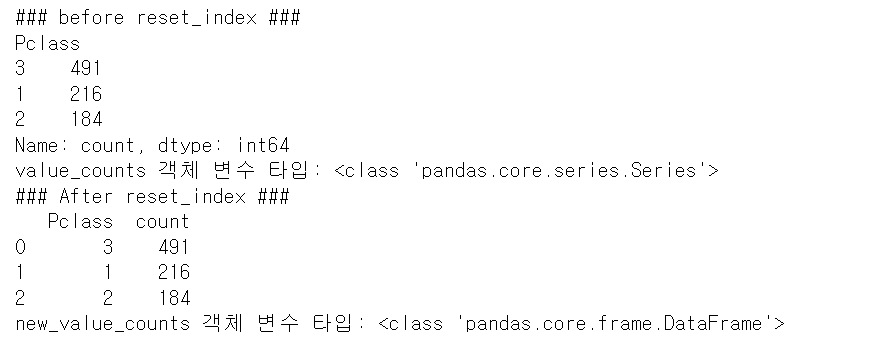
Series에 reset_index()를 적용하면 새롭게 연속 숫자형 인덱스가 만들어지고 기존 인덱스는 'index' 칼럼명으로 추가되면서 DataFrame으로 변환된다. reset_index()의 parameter 중 drop = True로 설정하면 기존 인덱스는 새로운 칼럼으로 추가되지 않고 삭제된다. 새로운 칼럼이 추가되지 않으므로 그대로 Series 유지된다.
참고)
파이썬 머신러닝 완벽 가이드, 권철민, 위키북스
'AI > 머신러닝' 카테고리의 다른 글
| [ML 실습] 6일차 복습- 판다스 DataFrame(3) (0) | 2025.01.28 |
|---|---|
| [ML 실습] 3일차 복습- 넘파이 마지막, 판다스 시작 (0) | 2025.01.27 |
| [LG AImers 6기] ML이론 - Bias and Variance (2) | 2025.01.23 |
| [LG AImers 6기] ML이론 - Introduction to ML (2) | 2025.01.21 |
| [ML 실습] 2일차 복습- 넘파이 ndarray 인덱싱 (0) | 2025.01.18 |


